Ever had that perfect photo ruined by a rogue tourist, an ugly power line, or some weird trash in the background? Ugh, I know the feeling. It’s frustrating to capture a beautiful moment only to have some unwanted element steal the show.
- Best All-Around (Paid): Adobe Photoshop Generative Fill – Unmatched quality and control for any scenario.
- Best Free for Simple Removals: Cleanup.pictures – My go-to for quick, fuss-free background fixes.
- My Key Tip: Always select slightly more than the object you want to remove, and don’t be afraid to try a few times to get it right.
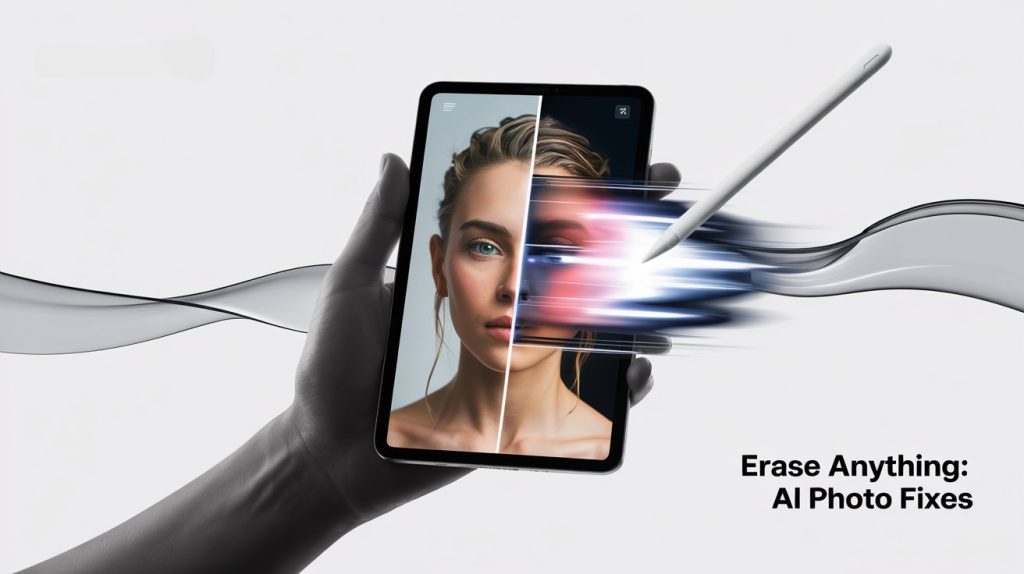
What Even Is AI Object Removal (and Why It’s Not Magic)?
When we talk about “AI object removal,” we’re really talking about a cool technology called inpainting. Think of it like this: traditional photo editing might let you “clone” a patch of clear sky over a bird. It works, but if the background is complex, it gets messy fast. AI takes this to a whole new level.
The Basics: Inpainting & Generative AI
Instead of just copying pixels, AI uses generative models to analyze the surrounding areas of your photo – the textures, colors, and patterns – and then predicts what should be there. It then magically fills in the gap, making the unwanted object disappear as if it was never there. It’s truly amazing when it works!
My Top 5 AI Object Removal Tools (Tested & Reviewed)
I’ve spent countless hours messing around with different tools, from expensive desktop software to free online apps. Here’s my honest take on the ones I rely on:
Adobe Photoshop (Generative Fill / Remove Tool): My Pro Workhorse
When I need the absolute best results, especially for complex photos, I head straight to Photoshop. Its Generative Fill is a game-changer.
- What I Loved: The quality is usually top-notch, even with intricate backgrounds. I love that it gives me three variations to choose from, and it integrates seamlessly into my non-destructive editing workflow with layers. Plus, the dedicated Remove Tool is fantastic for areas where the background just needs to be covered rather than completely reimagined.
- What I Didn’t Love: Let’s be real, Photoshop isn’t free. The subscription can be a barrier, and the sheer number of features can feel a bit overwhelming if you’re new to it.
- My Workflow Tips:
- I’ve found it’s crucial to understand the difference between the Remove Tool and Generative Fill. If I’m just getting rid of a simple wire against a clear sky, the Remove Tool is faster and often perfect. But if I’m erasing a person standing in front of a complex brick wall where the wall needs to be reimagined, Generative Fill is my hero.
- Always expand your selection a bit beyond the object. If I just select the object perfectly, the AI doesn’t have enough context to blend smoothly. A little extra wiggle room makes a huge difference.
 From Your Photos with AI. 1")
Cleanup.pictures: My Go-To for Quick, Free Fixes
For those moments when I just need something gone now and don’t want to open Photoshop, Cleanup.pictures is my absolute favorite free online tool.
- What I Loved: It’s incredibly simple – upload, brush, download. No sign-up required, and it’s surprisingly effective for straightforward removals like background clutter or a small person far away.
- What I Didn’t Love: The quality can sometimes falter on very intricate patterns or close-up details. There’s also not a lot of control beyond brush size. It’s web-only, so no dedicated mobile app.
- My Workflow Tips: I often “oversaturate” my brush stroke, meaning I paint a bit more than just the object, ensuring the AI gets a solid area to work with. It often leads to a cleaner blend.
 From Your Photos with AI. 2")
SnapEdit.app: A Strong Mobile & Web Contender
SnapEdit offers a good middle ground, providing a decent balance of ease and quality, and it works on both web and mobile.
- What I Loved: Its “AI Object Detection” feature is pretty neat for automatically identifying common distractions. It’s generally intuitive to use.
- What I Didn’t Love: The free version has limitations, and sometimes the AI leaves subtle blurs or odd textures, especially on larger removals. I’ve found it’s not quite as robust as Photoshop.
- My Workflow Tips: I usually start with their “AI Object Detection” to see what it catches. If it misses something or the result isn’t perfect, I’ll refine it with manual brushing. Sometimes, using the manual brush after detection yields a better result than relying solely on the AI.
 From Your Photos with AI. 3")
Google Photos Magic Eraser (Android/iOS): The Convenient Choice
If you’re already in the Google Photos ecosystem, the Magic Eraser is incredibly convenient for on-the-go fixes.
- What I Loved: It’s built right into the app, so it’s super fast to use. For small, simple background distractions, it’s surprisingly effective.
- What I Didn’t Love: This is where I’ve hit some significant snags. The Magic Eraser struggles hard with reconstruction, especially if an object is touching a person or a complex foreground. I once tried to remove a hand covering a face, and the result was… well, let’s just say it looked like my face went through a meat grinder. I’ve also noticed it can sometimes downsample high-resolution photos (like 50MP) to 12MP after processing, leading to a noticeable drop in quality.
- My Workflow Tips: I treat this tool as a “simple background elements only” option. Don’t expect it to rebuild anything intricate. If the object is anywhere near a person’s face or body, I’ll use a desktop tool instead.
 From Your Photos with AI. 4")
Pixelmator Pro (Mac): A Hidden Gem
For my fellow Mac users, Pixelmator Pro is a powerful, one-time purchase tool that has an excellent Repair tool (their version of inpainting).
- What I Loved: It’s incredibly fast and its algorithm is fantastic for smoothly filling in textures. It’s also fully non-destructive and offers other advanced editing features.
- What I Didn’t Love: It’s Mac-only, which limits its accessibility. While powerful, its “Repair” tool isn’t quite as “generative” as Photoshop’s, meaning it’s less likely to invent entirely new content, and more focused on blending existing textures.
- My Workflow Tips: I often use Pixelmator Pro for landscapes or architectural shots where I need to remove distractions from repetitive textures. Its Repair tool, combined with its other local adjustment brushes, allows for a truly seamless finish.
 From Your Photos with AI. 5")
The “Gotchas” I Faced: Common Problems & My Troubleshooting Hacks
Let’s be honest, AI isn’t perfect. I’ve run into plenty of frustrating moments where it just didn’t get it right. Here are the common “gotchas” and how I’ve learned to tackle them:
The Dreaded “Smudge” or “Artifact” (AI Hallucinations)
This happens when the AI tries to guess what should be in the empty space but creates something illogical or blurry. It’s like the AI “hallucinates” a new object or pattern. I’ve seen it leave weird shadows or even add new, unwanted elements where nothing should be.
- My Fix:
- Multiple Attempts: Don’t give up after one try! I often re-select the area (sometimes with a slightly different size or shape) and hit “generate” again. The AI will give you new variations.
- Varying Selection Size: Sometimes a slightly larger selection gives the AI more context; other times, a very tight, precise selection around just the problem spot works better. Experiment!
- Final Touch-Ups: For stubborn tiny spots, a traditional clone stamp or healing brush (even in a basic photo editor) can work wonders to smooth out the last bits.
When the Background is Too Complex (Patterns & Reflections)
Removing a person from a simple blue sky is easy. Removing them from a busy crowd, a patterned wall, or a reflective window? That’s a whole different ballgame. The AI struggles to perfectly replicate intricate details it can’t “see” behind the object.
- My Hack:
- Break it Down: For large, complex objects, I sometimes tackle them in smaller segments. Remove a piece, let the AI fill, then move to the next.
- Manual Intervention: If it’s a critical area, I might use the AI for the bulk removal, then switch to a traditional clone stamp or healing brush for the super-fine details and edge refinement, pulling from nearby areas that do exist.
- Consider the Context: Sometimes, a slightly imperfect result is “good enough” if the object being removed is small or far away and won’t be scrutinized closely.
 From Your Photos with AI. 6")
Losing Image Quality (Especially on Mobile)
This one caught me off guard! I’ve had high-resolution photos (like 50MP from my phone) get processed by mobile AI object removers and returned as a 12MP image. This isn’t just about file size; it’s a noticeable drop in detail.
- My Workaround:
- Start High: Always begin with the highest quality original photo you have.
- Check Output: After any AI removal, I always double-check the final image resolution and file size. If it’s significantly lower, I know I might have lost detail.
- Desktop for Critical Photos: For images I plan to print or use professionally, I avoid mobile AI tools for object removal and stick to desktop software like Photoshop, which offers more control over output quality.
Accidental Object Generation (The AI Adds Stuff!)
Sometimes, when you leave the prompt blank for generative fill (expecting it to just remove), the AI gets creative and adds something new! Or it might try to rebuild an area and put a similar object back in its place.
- My Tip:
- Be Explicit: In tools like Photoshop, if you only want to remove, you can sometimes type “remove” into the prompt box.
- Tight Selections: For simpler tools, make sure your selection is as tight as possible around the object you want gone, and don’t expand too far into areas where the AI might get confused.
My Process: How I Remove Unwanted Objects Step-by-Step
After all my experimenting, here’s the general workflow I follow to get the best results:
Step 1: Analyze Your Photo & the “Problem”
Before I even open a tool, I take a good look at the photo. Is the unwanted object small and against a simple background? Or is it large, complex, and intertwined with the main subject or a busy scene? This helps me decide which tool to even bother with. A simple background means Cleanup.pictures or Magic Eraser might suffice. Complex? Straight to Photoshop.
Step 2: Make Your Initial Selection (and Make it Generous!)
I pick my tool and activate the brush. I always try to select a little more area than just the object itself. This gives the AI more context to draw from, leading to a more seamless blend. For tiny objects, a small, precise brush is key. For large objects, a bigger brush covers ground faster, but I’ll often refine the edges with a smaller brush.
 From Your Photos with AI. 7")
Step 3: Iterate & Refine (This Isn’t Always One-Click Magic)
This is where patience comes in. I hit “generate” or let the tool process. If the first attempt isn’t perfect, I don’t just accept it.
- I’ll try clicking through the different variations (if the tool offers them, like Photoshop).
- If still not good, I’ll hit “generate” again.
- Sometimes, I’ll undo and re-select the area, maybe making the selection slightly different, to give the AI a fresh start.
- For persistent issues on edges, I might use a smaller brush just on that problem spot.
Step 4: The Final Polish (Sometimes Manual is Best)
Even the best AI isn’t always 100% perfect. For truly flawless results, especially on client work or photos I plan to print big, I often zoom in and look for any remaining tiny smudges, color shifts, or awkward patterns. This is where I might grab a traditional clone stamp or healing brush to manually touch up those last few pixels. It takes a few extra seconds, but it makes all the difference.
The Bottom Line on AI Object Removal
AI object removal is a fantastic advancement, making what used to be painstaking tasks remarkably easy. It’s a lifesaver for rescuing otherwise great photos from annoying distractions. However, it’s not a magical “fix all” button (yet!). You’ll get the best results by understanding your tools, knowing their limitations, and being willing to iterate a bit.
My best advice? Start simple, experiment with a few different tools, and don’t be afraid to try multiple times. The more you practice, the better you’ll get at anticipating how the AI will behave.
What tools have you tried for object removal, and what’s your best “aha!” moment or biggest frustration? Share your results and tips in the comments below! 🙂